What Is the Best Way to Waterproof Indoor Lights?

Time:2026-10-09 Author:Ethan
0%

Turning an indoor light into an outdoor fixture sounds simple, but moisture creates hidden risks. Water can enter through the socket, switch, cable entry, or tiny cracks around the housing. Condensation can also form inside the fitting after a cold night. That detail is easy to miss.

For anyone researching how to waterproof indoor lights for outdoor use, the safest answer begins with a limitation: many indoor fixtures should not be modified for outdoor installation. Their insulation, seals, wiring, and heat management may not meet outdoor requirements. Mike Holmes, a licensed contractor and building expert, has often warned, “Water and electricity don’t mix.” His advice remains practical here. A plastic cover alone does not make a fixture weatherproof.

This guide will examine suitable enclosures, outdoor-rated cable glands, drainage, corrosion-resistant hardware, and weatherproof junction boxes. It will also explain why an appropriate IP rating matters. An IP rating shows protection against solid objects and moisture, but it does not solve every installation problem. Direct rain, wind-driven water, freezing temperatures, and sunlight can test weak points quickly.

Safety comes first.

A ground-fault circuit interrupter, correct grounding, and sealed connections are essential considerations. Local electrical rules may also require licensed installation. Some advice online feels convincing but overlooks heat buildup or trapped moisture. That is where mistakes happen. Honestly, replacing an indoor fixture with a certified outdoor model is often cheaper and more reliable than attempting a repair. Still, careful evaluation can help readers understand what is possible, what is unsafe, and when professional judgment is necessary.
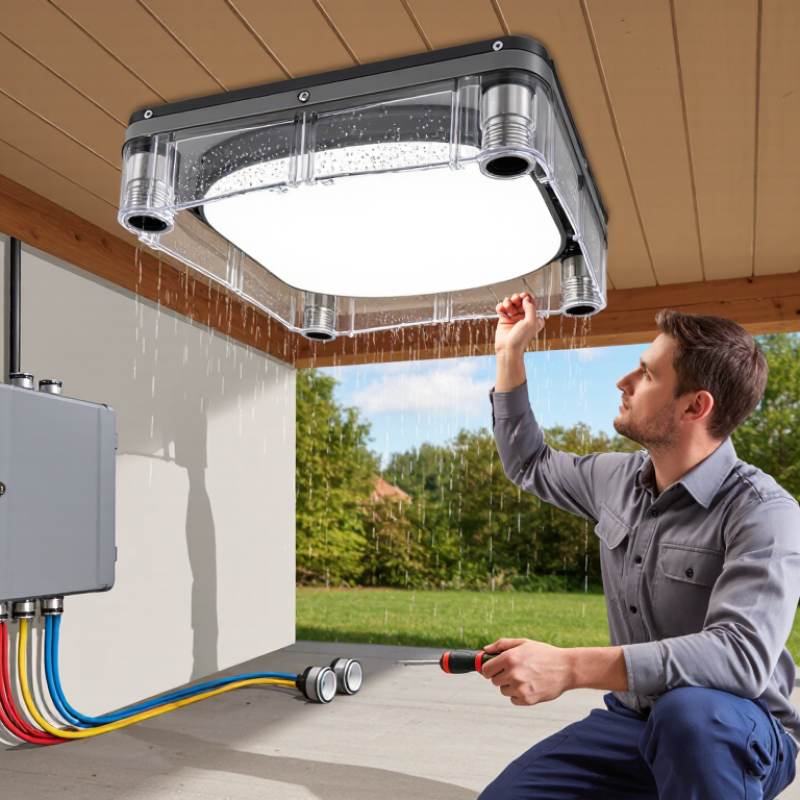
What Is the Best Way to Waterproof Indoor Lights?

Understanding Indoor Light Waterproofing Requirements

Indoor light waterproofing begins with the environment, not the fixture. A bathroom ceiling light faces condensation, while a covered patio may receive wind-driven rain. IEC 60529 classifies IP65 as dust-tight and protected against water jets. IP67 adds temporary immersion protection, typically up to one metre for 30 minutes. These ratings describe laboratory conditions, not every installation.

Check the entire assembly. The housing, gasket, cable entry, switch, and mounting surface must match the required protection level. NEMA 250 identifies Type 4 enclosures for hose-directed water and Type 6 enclosures for temporary submersion. Do not confuse water resistance with waterproofing. A cracked seal can defeat a strong rating. Moisture often enters through a poorly tightened cable gland.

Installation details matter. Keep connectors above likely splash zones, create a drip loop, and avoid trapping water behind the mounting plate. The U.S. Department of Energy’s solid-state lighting reports continue to identify thermal management and reliability as key performance concerns; moisture can worsen both by corroding contacts and reducing heat transfer. That link is easy to overlook.

Use products tested for the actual location. Outdoor-rated does not automatically mean suitable for a shower enclosure. Inspect seals twice yearly, especially after cleaning or temperature changes. Replace hardened gaskets. I have seen careful specifications fail because installers punctured a seal during wiring. The rating was correct. The installation was not.

Choosing Waterproof Fixtures, Enclosures, and Suitable Materials

What Is the Best Way to Waterproof Indoor Lights?

Choosing a waterproof indoor light starts with the room’s actual moisture level. A bathroom ceiling above a shower needs more protection than a dry hallway. Check the fixture’s IP rating, not just the word “waterproof.” The first number indicates dust protection, while the second measures resistance to water. For shower areas, select a rating approved for direct spray exposure. Local electrical requirements still matter.

A sealed fixture should include a tight gasket, corrosion-resistant screws, and a housing made from suitable materials. Polycarbonate resists impact and moisture, while coated aluminum helps manage heat. Stainless steel performs well in damp rooms, but poor joints can still allow corrosion. Use an enclosure when the lamp or wiring needs extra separation from steam. Cable entries should face downward whenever possible. Water follows gravity.

During installation, keep seals clean and avoid crushing them with excessive pressure. A small cut in a gasket may remain invisible until condensation appears inside the fixture. Silicone sealant can help around approved openings, but it should not replace a proper enclosure or certified fitting. An electrician should verify connections, grounding, and clearance requirements. It is tempting to choose the highest rating everywhere, yet heat buildup and maintenance access also deserve attention. No fixture stays perfect without inspection. Check for fogging, rust, loose covers, and brittle seals every few months.

Preparing the Light and Installation Area Safely

Before waterproofing an indoor light, switch off the circuit at the breaker. Confirm zero voltage with a tested voltage detector. Do not rely on the wall switch alone. Remove the shade, lamp, and trim, then inspect the socket, wiring, and ceiling opening for brown marks, corrosion, or damp insulation.

The installation area must be dry, stable, and free from loose plaster. Wipe condensation from nearby surfaces and repair the moisture source before installing anything. NFPA’s Home Structure Fires report for 2017–2021 found that electrical distribution and lighting equipment were involved in 32% of reported home structure fires. That figure makes careful preparation more than a cosmetic step. It also challenges a common shortcut: silicone sealant cannot correct damaged wiring or an unsuitable junction box.

Select a fixture with an ingress protection rating suited to its exposure. IEC 60529 defines IP ratings, where the second digit measures water protection. IPX4 generally handles splashing water, while IPX5 withstands water jets under specified test conditions. Check the manufacturer’s installation instructions, especially for bathrooms, laundry rooms, and ceiling areas below plumbing. Fit intact gaskets, tighten cable entries evenly, and keep connections inside an approved enclosure. Never block ventilation openings on heat-producing fixtures. I have seen over-sealed housings trap moisture and heat, creating a problem the sealant was meant to prevent. If the circuit, grounding conductor, or mounting surface looks uncertain, stop and use a qualified electrician.

What Is the Best Way to Waterproof Indoor Lights? - Preparing the Light and Installation Area Safely
Preparation or Installation Stage Recommended Requirement Relevant Technical Detail Safety Check Completion Indicator
1. Identify Moisture Exposure Classify the location as dry, damp, or wet before selecting the light. Bathrooms, utility rooms, covered porches, and areas near sinks may experience condensation or splashing. Check for leaks, standing water, condensation, and direct spray paths. The light’s environmental rating matches the actual installation area.
2. Select the Correct Ingress Rating Use a luminaire with an IP rating suitable for the expected water exposure. IP44 protects against solid objects larger than 1 mm and water splashes from all directions. IP65 is dust-tight and protected against water jets. Do not treat an IP rating as proof that a light can be submerged unless the rating specifically permits immersion. The complete fixture, including joints and accessories, has the required rating.
3. Confirm Electrical Compatibility Verify the voltage, frequency, load, dimming method, and wiring requirements before installation. Electrical characteristics must match the supply circuit and the fixture’s installation instructions. Turn off the circuit breaker or fuse and verify that power is absent with a properly rated tester. The circuit is isolated, identified, and compatible with the light.
4. Provide Ground-Fault Protection Use GFCI or RCD protection where required by local electrical rules or where moisture increases shock risk. These protective devices are designed to disconnect power when they detect an imbalance in current. Test the protective device using its test control before beginning work and follow local requirements. Protection operates correctly and is suitable for the circuit.
5. Prepare the Installation Surface Use a clean, dry, stable surface capable of supporting the fixture and any mounting hardware. Remove dust, grease, loose paint, and debris. Repair cracks or damaged mounting points before fitting the light. Do not install over active leaks, damp insulation, or surfaces that cannot hold the fasteners securely. The mounting area is firm, level, dry, and free from visible damage.
6. Protect Cable Entry Points Route cables through suitable glands, bushings, or sealed entries designed for the fixture. Water can enter through cable openings even when the light housing itself is rated for moisture resistance. Ensure cable entries are tightened without crushing the cable and that unused openings are properly closed. No open cable path or unsealed entry remains.
7. Seal Mounting Interfaces Carefully Use only compatible gaskets or sealants where the fixture instructions permit them. Over-sealing drainage paths or covering required ventilation openings can trap moisture and cause overheating. Keep seals continuous around approved entry points, but do not block drainage holes or heat-dissipation areas. Gaskets are seated evenly and sealing materials are compatible with the fixture.
8. Make and Protect Connections Use approved connectors, junction boxes, and enclosures appropriate for the environment. Connections should be mechanically secure, insulated, and protected from moisture; ordinary indoor connectors may not be suitable in damp locations. Check that no bare conductor is exposed and that strain relief prevents pulling on terminals. Connections are enclosed, secure, dry, and accessible for permitted maintenance.
9. Install Without Damaging the Housing Follow the fixture’s mounting sequence and use the specified fasteners. Over-tightening can deform a gasket or crack a housing, while under-tightening can allow movement or water entry. Inspect the lens, housing, gasket, and cable glands for cracks, gaps, or distortion. The housing closes evenly and all mounting points are secure.
10. Test Before Regular Use Restore power only after the installation has been inspected and the area is clear. Check illumination, switching, dimming, unusual noise, flicker, heat, and protective-device operation. Stop immediately if there is sparking, a burning smell, repeated tripping, water entry, or abnormal heating. The light operates normally without visible moisture or electrical warning signs.
11. Maintain the Waterproofing Inspect the fixture periodically and after cleaning, leaks, impact, or building work. Replace cracked lenses, hardened gaskets, damaged glands, and corroded hardware rather than relying on additional sealant. Isolate power before opening or servicing the fixture, and keep water away from exposed electrical parts. The enclosure remains intact and the ingress protection has not been compromised.
12. Escalate Unsafe Work Use a qualified electrician when new wiring, circuit changes, concealed connections, or code compliance is involved. Electrical work requirements vary by location, and incorrect installation can cause shock, fire, or equipment damage. Do not work on energized circuits or rely only on a wall switch to isolate power. The installation complies with local electrical regulations and the fixture instructions.

Sealing Connections and Installing Protective Components

What Is the Best Way to Waterproof Indoor Lights?

Waterproofing indoor lights starts with sealing every electrical connection. Moisture can enter through tiny gaps around terminals, cable entries, and cracked insulation. Turn off the circuit at the breaker before opening any fitting. A voltage tester should confirm that no power remains. Dry the area completely, then inspect each wire for corrosion or brittleness. I have found that a clean, dry connection often matters more than adding extra sealant.

Use suitable terminal blocks or sealed connectors inside a protective junction box. Cable glands should grip the outer cable jacket, not the individual wires. Tighten them firmly, but do not crush the cable. A flexible gasket can seal the cover, while outdoor-grade silicone may close small, stable gaps. Silicone is not a substitute for a damaged enclosure. That mistake is easy to make.

Choose protective components with an appropriate IP rating for the room’s moisture level. Bathrooms, laundry areas, and enclosed porches may need different protection. Install the fitting so water cannot collect above the connection. A small drip loop can guide moisture away from the entry point. Keep the lamp away from direct spray and allow ventilation around heat-producing parts. Test the light after installation and inspect it again after several days. My first installation looked secure, but condensation later showed a poorly sealed cable entry. Rechecking is worthwhile. If the wiring is concealed or the area is frequently wet, have a qualified electrician assess the installation.

Testing, Inspecting, and Maintaining Waterproof Indoor Lights

Waterproof indoor lights need more than a sealed housing. Their protection depends on correct installation, intact gaskets, and regular inspection. Check the fixture’s IP rating against the room’s moisture level. Bathrooms, laundry rooms, and enclosed kitchens may need different protection. A suitable rating does not correct poor installation.

Turn off the circuit before examining any light. Confirm the power is isolated with an approved tester. Inspect the lens, cable entry, screws, and rubber seals for cracks or movement. Look for condensation, brown marks, corrosion, or flickering. These signs deserve attention. Do not open a damp fixture while energized. A qualified electrician should investigate repeated moisture or damaged wiring.

Testing should be gentle and controlled. Wipe the exterior with a damp cloth, then check whether water reaches the lens edge or cable joints. Never spray water directly at an indoor light unless the manufacturer’s instructions allow it. After cleaning, dry the surface and examine it again under a bright torch. Keep a simple inspection record with dates and observations. I once assumed a tight lens meant complete protection, but a loose cable gland caused hidden moisture. That mistake changed my maintenance routine. Inspect after renovations, unusual leaks, or visible condensation, even when the light still works. Replace hardened seals and damaged covers promptly, rather than relying on temporary tape.

What Is the Best Way to Waterproof Indoor Lights?

Testing, inspecting, and maintaining indoor lights starts with checking the IP water-protection rating. The chart summarizes the water-protection levels defined by IEC 60529. The score is ordinal and does not represent a linear increase in waterproof performance.

Maintenance guidance: Switch off power before inspection, check seals and cable entries for cracks or gaps, remove dust and moisture with a dry or slightly damp cloth, and replace damaged components. Always use a light with an IP rating suitable for the installation area and follow the product’s instructions.

FAQS

What IP rating suits an indoor bathroom light?

Choose a rating approved for the fixture’s actual splash exposure. A shower ceiling needs more protection than a dry hallway. IP65 resists dust and water jets. IP67 also allows temporary immersion under laboratory conditions. Local electrical rules still apply.

Does “waterproof” guarantee complete protection?

No. “Waterproof” can hide important limits. A cracked gasket or loose cable gland may let moisture inside. The whole assembly must match the required protection level. Labels alone are not enough.

Which parts should be checked before installation?

Inspect the housing, gasket, cable entry, switch, connectors, and mounting surface. Each part must support the intended moisture protection. Look for clean sealing edges and corrosion-resistant screws. A strong housing cannot rescue a damaged seal.

How should cables and connectors be positioned?

Keep connectors above likely splash zones. Point cable entries downward where possible. Create a drip loop so water falls away from the connection. Water follows gravity. Avoid trapping water behind the mounting plate.

Are outdoor-rated fixtures suitable inside shower areas?

Not automatically. Outdoor exposure and direct shower spray are different conditions. Select a fixture tested for the specific indoor location. Check clearance, grounding, and local installation requirements before fitting it.

Which materials work well in damp indoor rooms?

Polycarbonate resists impact and moisture. Coated aluminum can help manage heat. Stainless steel suits damp spaces when joints are properly sealed. Material choice matters, but poor assembly can still cause corrosion.

Can silicone sealant replace a proper waterproof enclosure?

No. Sealant may support approved openings, but it cannot replace a certified enclosure or fitting. Use it carefully around clean, suitable surfaces. Too much sealant can complicate future maintenance.

How often should indoor light seals be inspected?

Check them every few months and after major cleaning or temperature changes. Look for fogging, rust, loose covers, and brittle gaskets. Replace hardened seals. Twice-yearly inspections are a practical minimum for damp areas.

Why does moisture affect light performance?

Moisture can corrode contacts and reduce heat transfer. Poor thermal management may shorten fixture life. I might underestimate this link. A light can appear bright while internal damage quietly develops.

Conclusion

Waterproofing indoor lights for outdoor use requires careful planning, suitable equipment, and regular maintenance. Begin by assessing the location, exposure to rain or moisture, ventilation needs, and the light’s electrical requirements. Choose fixtures specifically rated for damp or wet environments, or place the light inside a properly sealed enclosure made from durable, moisture-resistant materials. Before installation, switch off the power, inspect the light and wiring for damage, and ensure the mounting area is clean, dry, and stable.

Seal every cable entry, joint, and connection with appropriate waterproof glands, gaskets, or sealant, while avoiding blocked ventilation openings that could cause overheating. Protective covers and drip loops can further reduce water intrusion. After installation, test the light safely and inspect it for leaks, condensation, loose fittings, or corrosion. Regular cleaning, seal checks, and electrical inspections will help maintain reliable performance and reduce safety risks over time.

Ethan

Ethan

Ethan is a seasoned marketing professional with a deep expertise in our company's innovative product line. With a passion for sharing knowledge and insights, he takes the lead in regularly updating our corporate blog, where he explores industry trends, product features, and effective marketing......